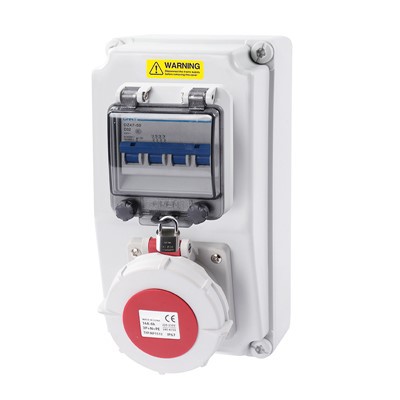
As a provider of wall-mounted distribution boxes, I often receive inquiries from customers about how to check the voltage in these boxes. Understanding the voltage status is crucial for ensuring the safe and efficient operation of electrical systems. In this blog, I’ll share some professional insights and practical steps on how to check the voltage in a wall-mounted distribution box. Wall Mounted Distribution Box
Understanding the Importance of Voltage Checks
Before delving into the checking process, it’s essential to understand why voltage checks are necessary. Electrical systems in wall-mounted distribution boxes are designed to operate within specific voltage ranges. Deviations from these ranges can lead to various problems, such as equipment malfunctions, overheating, and even electrical fires. Regular voltage checks help identify potential issues early, allowing for timely maintenance and preventing costly damage.
Preparing for the Voltage Check
Safety First
Safety should always be the top priority when working with electrical systems. Before starting any voltage check, make sure to follow these safety precautions:
- Wear appropriate personal protective equipment (PPE), including insulated gloves and safety glasses.
- Turn off the power supply to the distribution box. This can usually be done by switching off the main circuit breaker.
- Use a voltage tester to confirm that the power is indeed off before proceeding.
Gather the Necessary Tools
To check the voltage in a wall-mounted distribution box, you’ll need the following tools:
- A multimeter: This is the most common tool for measuring voltage. Make sure it’s in good working condition and set to the appropriate voltage range.
- A voltage tester: This can be used to quickly check if there’s any voltage present in a circuit.
- A screwdriver: You may need it to remove the cover of the distribution box.
Checking the Voltage
Step 1: Remove the Cover of the Distribution Box
Using a screwdriver, carefully remove the cover of the wall-mounted distribution box. Place the cover in a safe place to avoid damage.
Step 2: Identify the Voltage Terminals
Inside the distribution box, you’ll see various terminals and wires. The voltage terminals are usually labeled. Look for markings such as "L1," "L2," "N," and "G" (for live, neutral, and ground). The live terminals carry the electrical current, while the neutral terminal provides the return path for the current.
Step 3: Set the Multimeter
Set the multimeter to the appropriate voltage range. For most residential and commercial applications, you’ll need to set it to the AC voltage range. If you’re unsure about the voltage level, start with a higher range and then adjust it as needed.
Step 4: Measure the Voltage
- Measuring Line-to-Neutral Voltage: Insert the red probe of the multimeter into the live terminal (L1 or L2) and the black probe into the neutral terminal (N). The multimeter will display the voltage reading. In a standard 120V electrical system, the line-to-neutral voltage should be around 120 volts.
- Measuring Line-to-Line Voltage: If you want to measure the voltage between two live terminals (L1 and L2), insert the red probe into one live terminal and the black probe into the other. In a 240V electrical system, the line-to-line voltage should be around 240 volts.
Step 5: Check for Voltage Imbalance
It’s also important to check for voltage imbalance between the phases. A significant voltage imbalance can indicate a problem with the electrical system. To check for voltage imbalance, measure the voltage between each live terminal and the neutral terminal. The voltage readings should be relatively equal. If there’s a large difference in voltage between the phases, it could be a sign of a wiring issue or a problem with the power supply.
Step 6: Check the Grounding
The grounding system in a wall-mounted distribution box is crucial for safety. To check the grounding, use a multimeter to measure the resistance between the ground terminal (G) and a known ground point, such as a metal water pipe. The resistance should be very low, typically less than 10 ohms. If the resistance is high, it could indicate a problem with the grounding system.
Interpreting the Voltage Readings
Once you’ve taken the voltage measurements, it’s important to interpret the readings correctly. Here are some general guidelines:
- Normal Voltage Range: In a standard 120V electrical system, the line-to-neutral voltage should be between 110V and 125V. In a 240V electrical system, the line-to-line voltage should be between 220V and 250V.
- Voltage Deviations: If the voltage readings are outside the normal range, it could indicate a problem with the electrical system. For example, low voltage could be caused by a loose connection, a damaged wire, or an overloaded circuit. High voltage could be caused by a problem with the power supply or a malfunctioning voltage regulator.
- Voltage Imbalance: A voltage imbalance of more than 5% between the phases can cause problems for electrical equipment. If you detect a significant voltage imbalance, it’s important to investigate the cause and take appropriate action.
Troubleshooting and Maintenance
If you find any issues during the voltage check, it’s important to take appropriate action to address them. Here are some common problems and their solutions:
- Low Voltage: Check for loose connections, damaged wires, or overloaded circuits. Tighten any loose connections, replace any damaged wires, and reduce the load on the circuit if necessary.
- High Voltage: Contact your power provider to check for any problems with the power supply. You may also need to install a voltage regulator to stabilize the voltage.
- Voltage Imbalance: Check for wiring issues, such as a loose or damaged neutral wire. You may also need to balance the load on the electrical system to reduce the voltage imbalance.
Conclusion
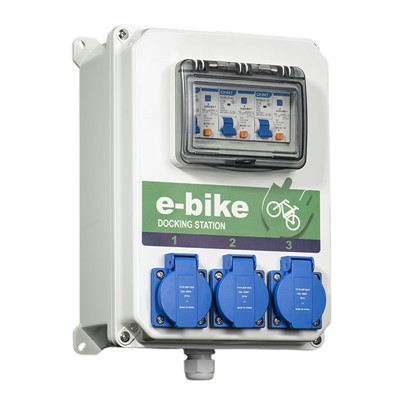
Mobile Distribution Box Checking the voltage in a wall-mounted distribution box is an important part of maintaining a safe and efficient electrical system. By following the steps outlined in this blog, you can ensure that your electrical system is operating within the proper voltage range and identify any potential issues early. As a wall-mounted distribution box provider, I’m committed to helping my customers maintain their electrical systems and ensure their safety. If you have any questions or need further assistance, please don’t hesitate to contact me. I’d be happy to discuss your specific needs and provide you with the best solutions for your electrical system.
References
- National Electrical Code (NEC)
- Electrical Safety Foundation International (ESFI)
- Institute of Electrical and Electronics Engineers (IEEE)
Apeks Electric Co., Ltd.
As one of the leading wall mounted distribution box manufacturers and suppliers in China, we also support custom service. With abundant experience, we warmly welcome you to wholesale high quality wall mounted distribution box from our factory. Welcome to view our website for more information.
Address: No.2 Yuyao Rd, Yuxin, Nanhu District, Jiaxing, China
E-mail: kevin@apekselectric.com
WebSite: https://www.powerdistros.com/